Installation
Prerequisites
To integrate your Xero account with Apruve, you need to have a Merchant account set up with us. If you do not yet have a merchant account contact us here to begin that process.
You will receive an email containing a link to confirm the account - you'll need to confirm it before you can move forward and use it.
You will of course also need a Xero account. More notably, you will need to have one of your two private application slots available. If you do not know what this means, then you are more than likely in the clear!
If you've completed the above, then you are all set! Follow the rest of the steps in this document to get Apruve up and running with your Xero account.
Creating a Private Application
At this time, we are only able to integrate with Xero through the use of a private app. Xero Organizations are able to have up to two private apps, so if you have already created two, you will be unable to integrate with Apruve (unless you remove one of the existing private apps).
Finding your Apruve certificate
- Log in to Apruve.
- On the left navigation, select "Settings", then "Xero Configuration".
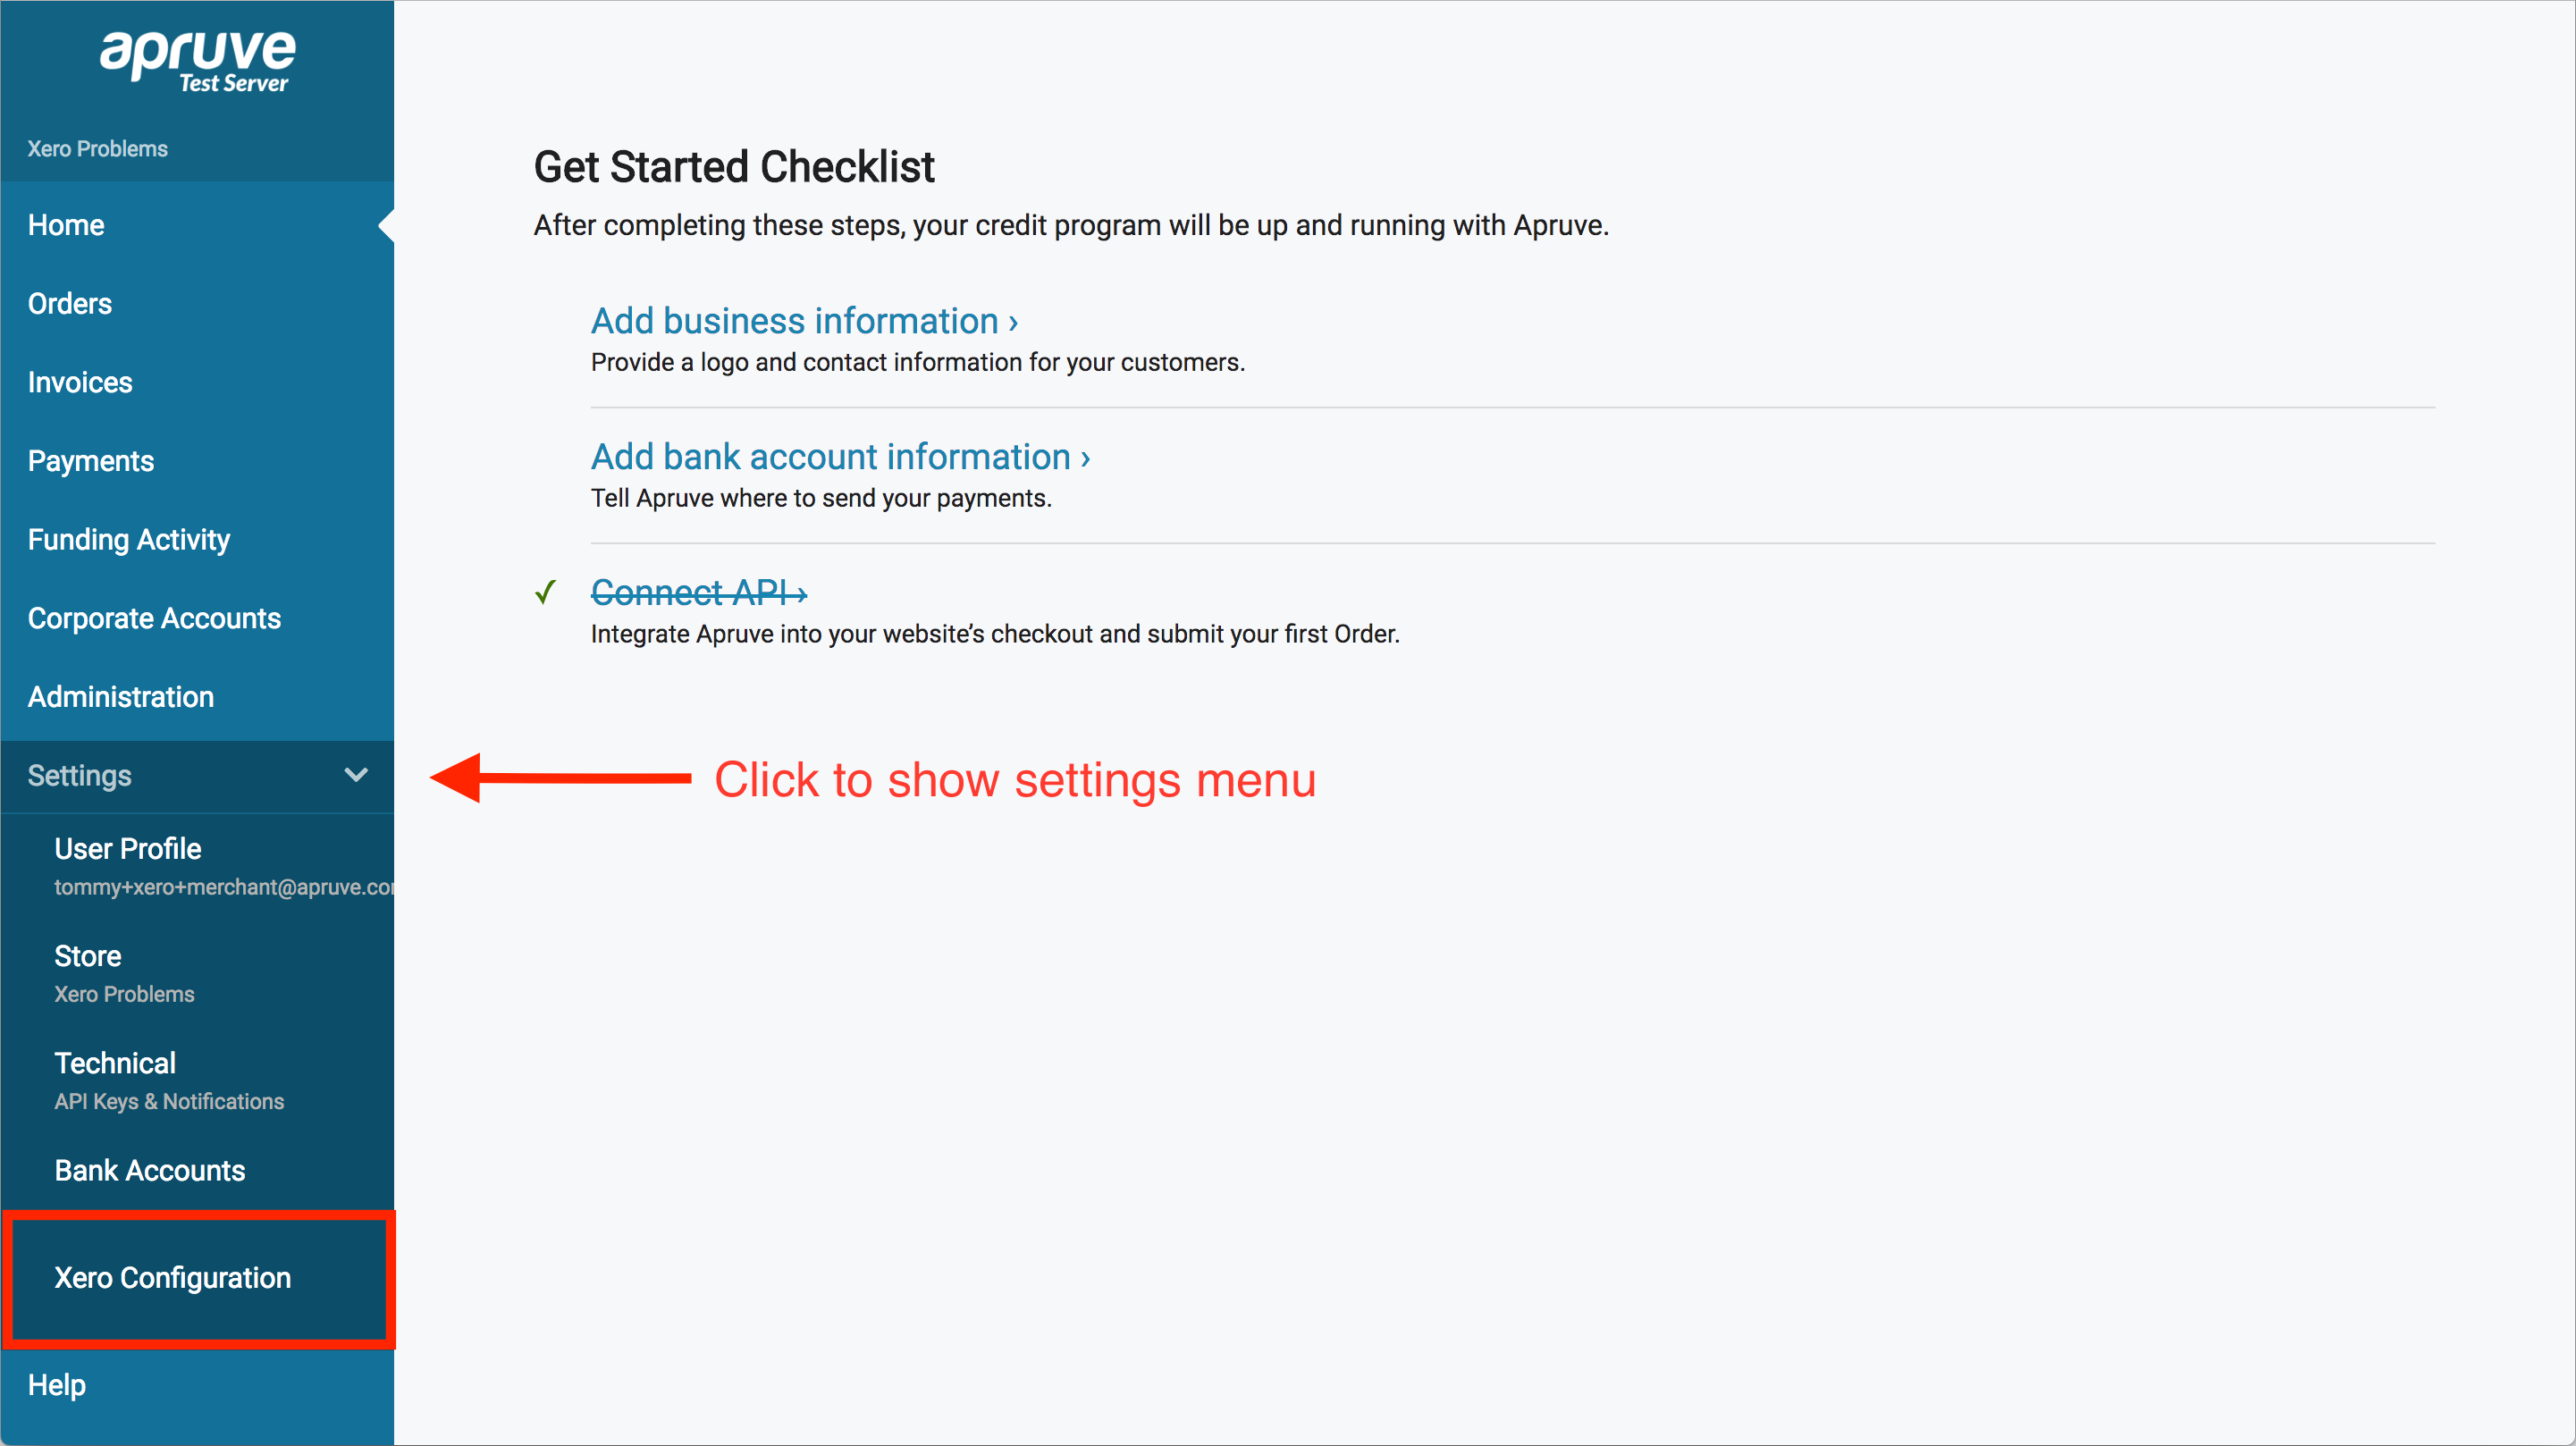
- Here you will see a link to download your public certificate. Save it to a place that you will remember, as we will be using it in the next section.
Creating a Private App
We will begin in your Xero Developer Dashboard. Don't worry, we will not need to do any coding!
- Log in with your Xero account.
- Navigate to the My Apps page by following the tab at the top of the screen.
- Click the "New App" button.
- Select the box labeled "Private app".
- Create a name for the app. The name you choose does not matter, but choose something that will remind you that it is associated with Apruve (like "Apruve"
 ).
). - Select the organization you wish to use with Apruve.
- Find that file that we downloaded in the last section and drag it to the box labeled "Public Key"
- Check the box indicating that you've read the terms and conditions (after you read them of course!)
- Click the "Create App" button.
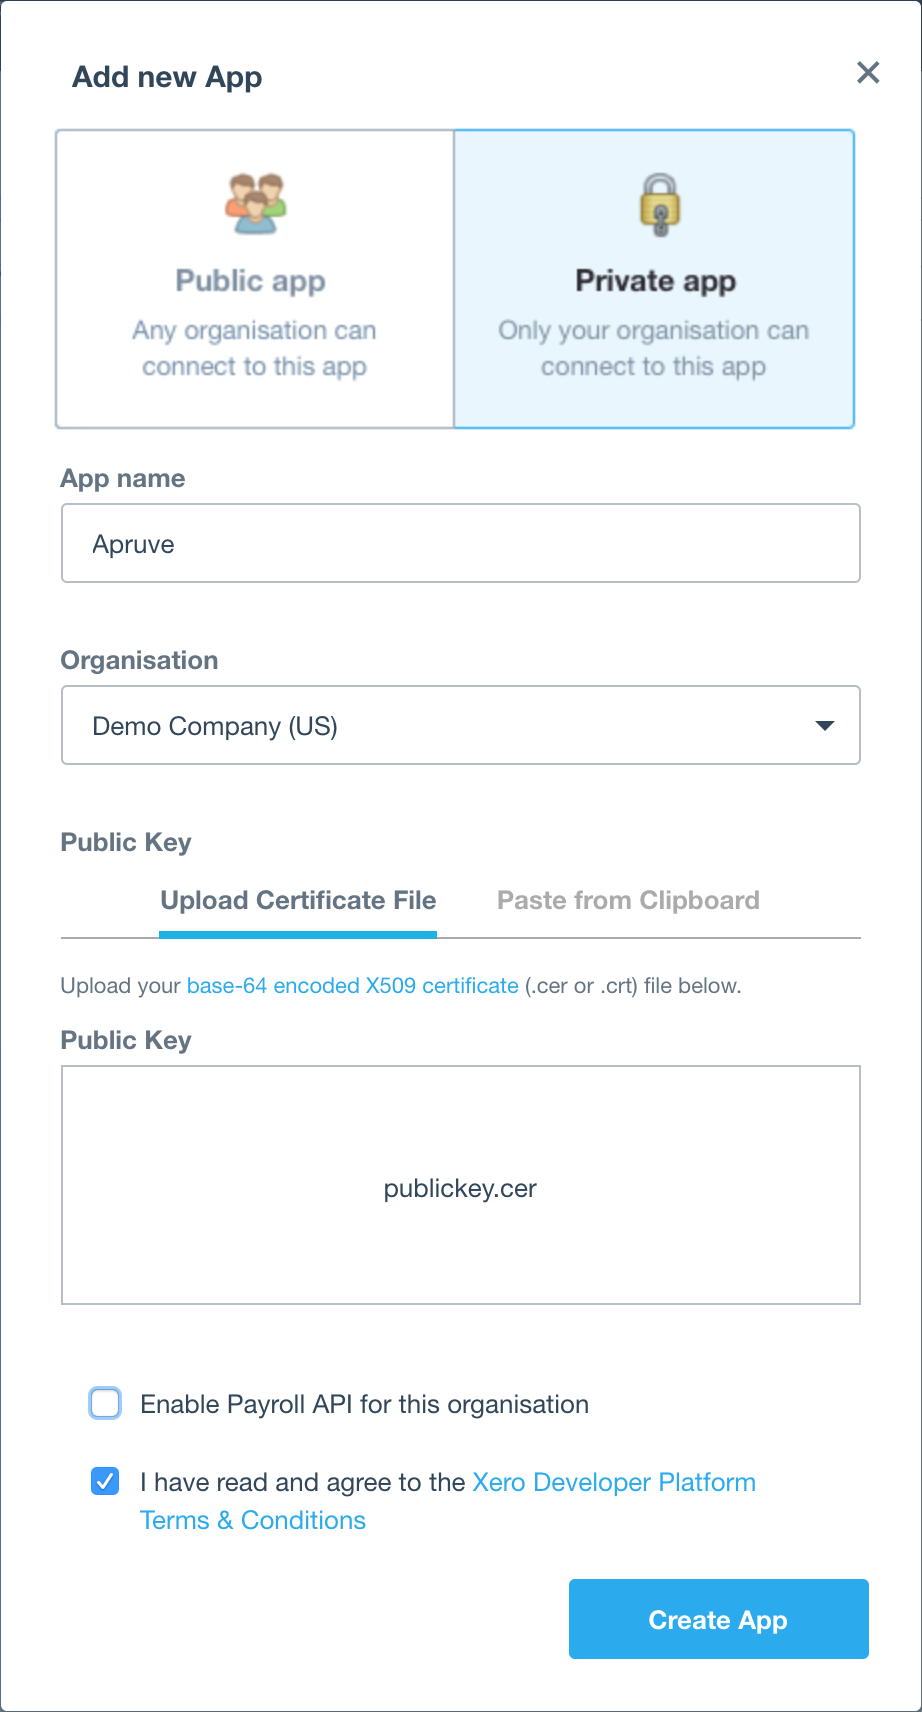
You do not need to enable the Payroll API
Your private app should be created and you should be brought to a page showing its App Details. Keep this page open for now, as we will need it in the following step.
Connecting Apruve to the Private App
Now your private app is set up and we just need to connect it to Apruve.
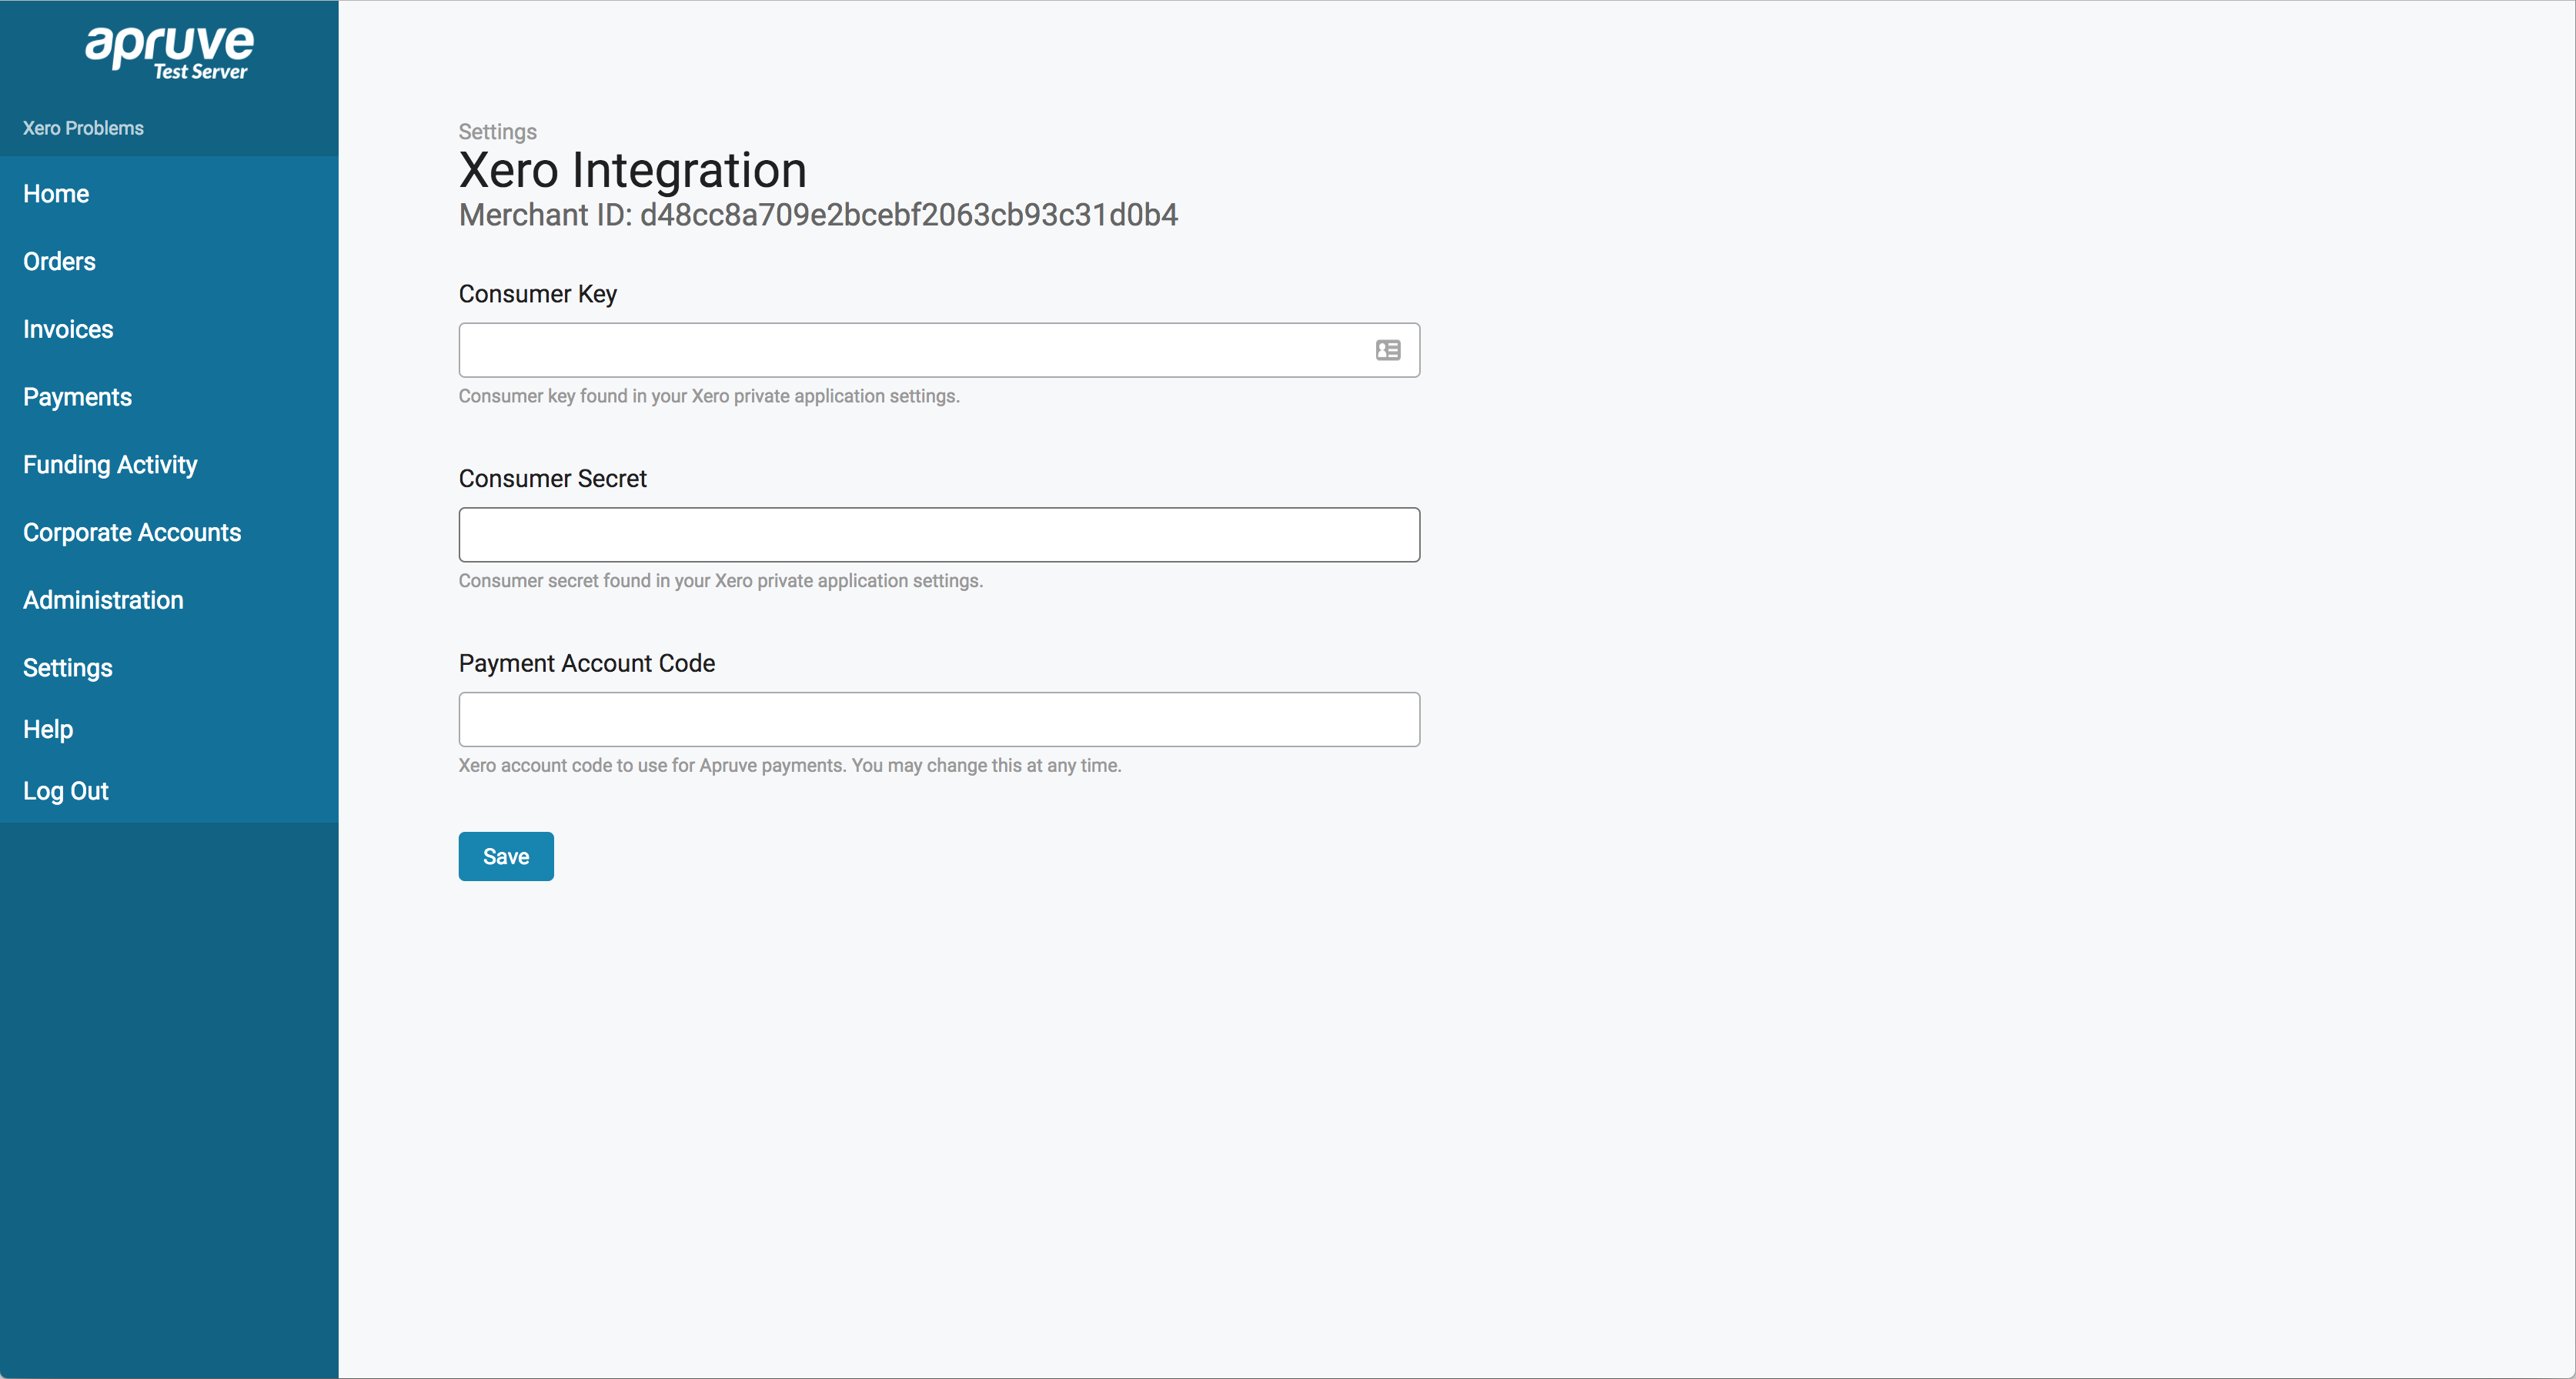
- In Apruve, navigate back to the Xero Configuration page. We did this in the first section of the installation process.
- You should see that there are 3 fields that you are able to enter: "Consumer Key", "Consumer Secret", and "Payment Account Code". We will work with the first two first.
- Hopefully you still have the Private App details page open. If not navigate there .
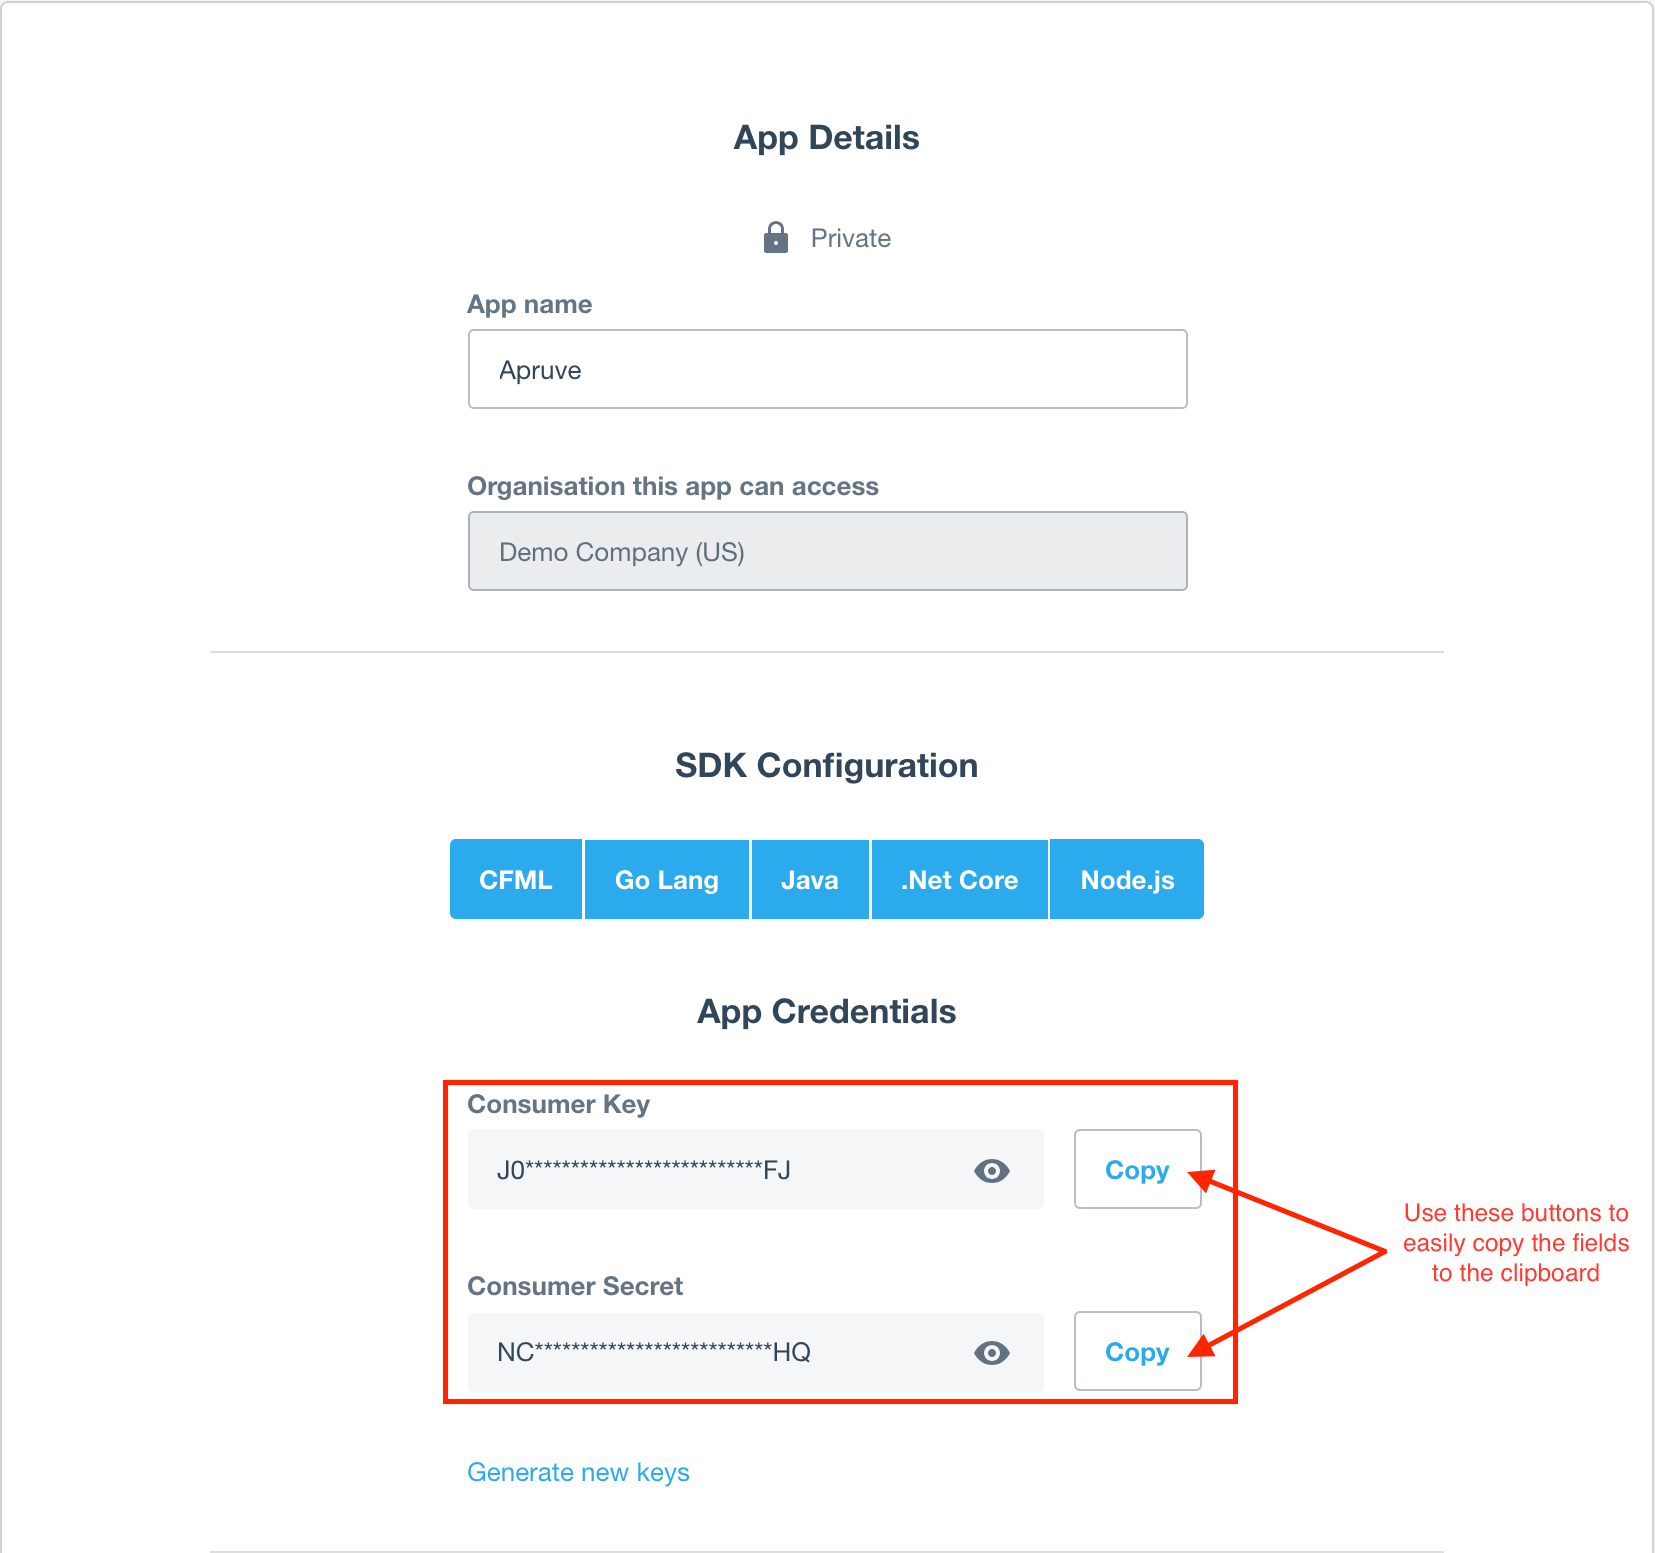
- In the App Details page, find the section labeled "App Credentials". You will see two fields "Consumer Key" and "Consumer Secret".
- One by one, copy these keys and paste them back in the corresponding field on your Xero Configuration page in Apruve.
- Back on your Xero Configuration page in the Apruve app, the consumer key and secret should be filled out. Next find the last field "Payment Account Code".
- Fill in the Payment Account Code with the account code in Xero that you wish Apruve payments top be associated with. You can change this at any time after installation.
- Click Save.
If any errors are shown, be sure that you've entered the consumer key and consumer secret correctly from the Xero Private App Details page. Also make sure that the account code exists in Xero. If you think everything is correct, yet you are still experiencing errors, please contact us at [email protected].
Assuming everything went smooth, Apruve is connected to your Private app and there is only one step remaining. Keep the Xero Configuration page open for this next section.
Creating the Apruve Payment Method
Now that we are all connected, we just need to enable Apruve as a payment method for your invoices.
- Navigate to the Xero Dashboard for the organization that you'd like to use with Apruve.
- On the top navigation bar, find and click "Settings", then "General Settings".
- At the bottom of this page in the category labeled "Connect", click "Payment Services".
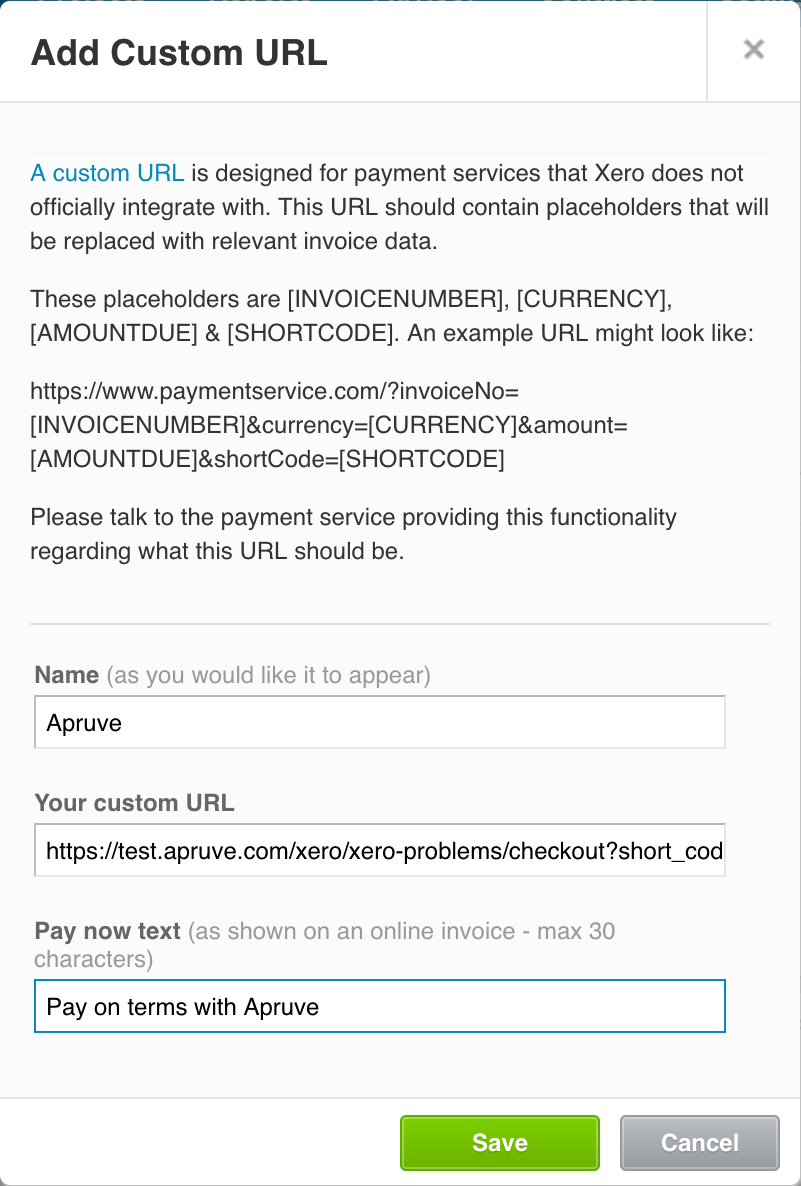
- Click the "+ Add Payment Service" button, and select the bottom option, "Custom Payment URL".
- Name the payment method what you'd like, we recommend simply "Apruve".
- Back in the Xero Configuration page in Apruve, find the Custom URL field.
- Copy this value and paste it back in the "Your custom URL" field in the Xero Payment Services page.
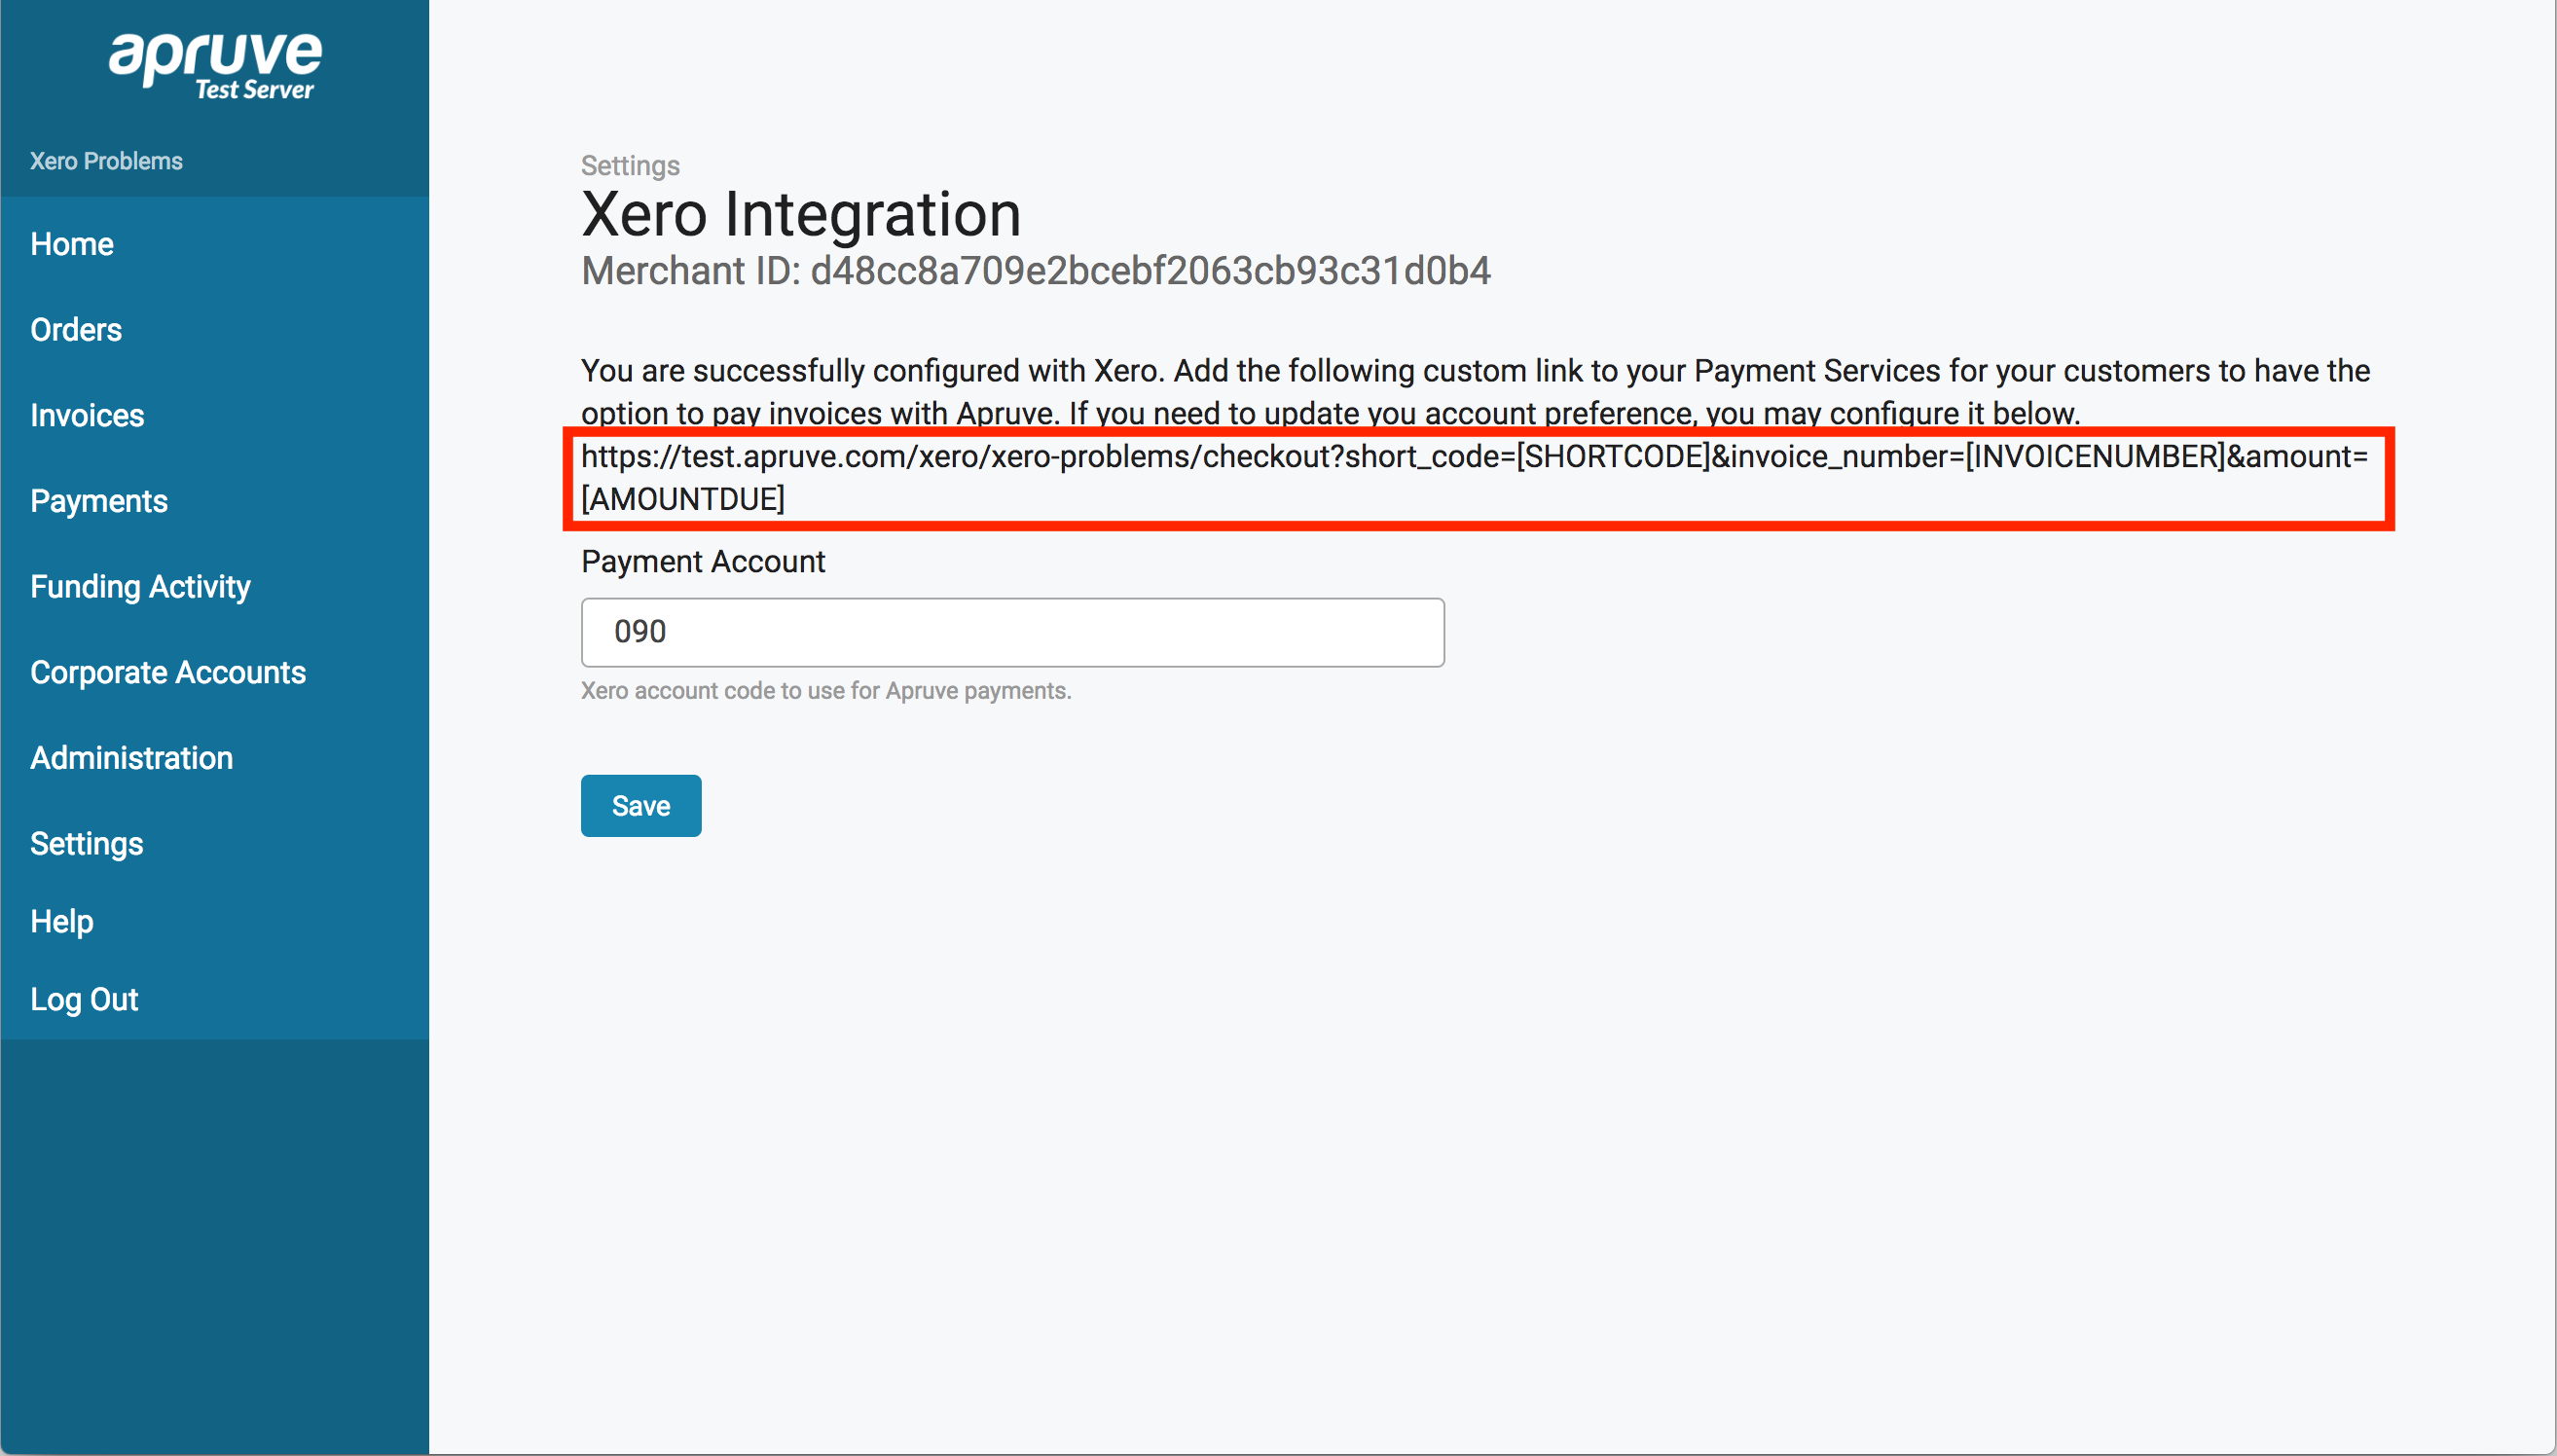
- Enter what you'd like the Pay Now text to look like on your invoices in the "Pay now test" field. We recommend "Pay on terms with Apruve". This determines the text in the button at the top of your invoices that your customer's will click to pay with Apruve.
- Click "Save".
- Now that the Payment service is created, click the "Manage themes" button to select which invoice branding templates you'd like Apruve to be available on.
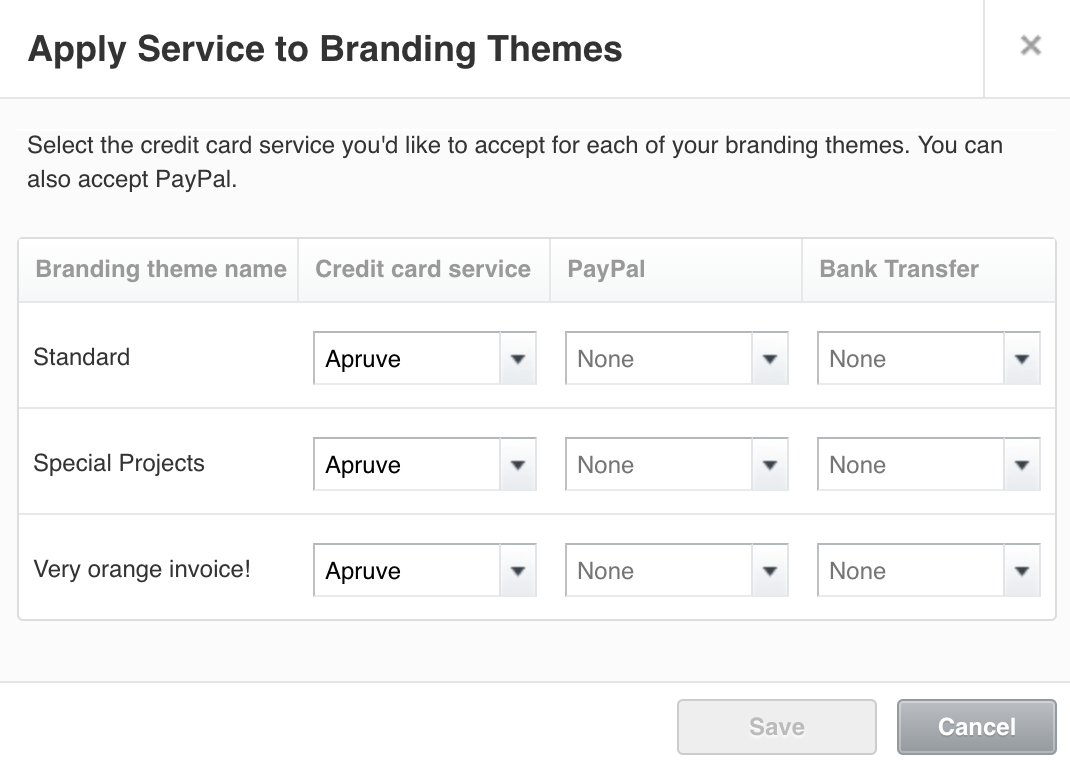
With this setup, Apruve will be available as a payment method for all invoices.
All Done!
The integration is finally complete. Now any of your customers that have a line of credit through Apruve can checkout with us directly from the pay now button on your invoices. For more information on the invoicing workflow in Xero using Apruve, click here.
Updated almost 6 years ago
